15 Dec

Blog Hop: Adding Atmosphere (the Stampin’ Up! post)
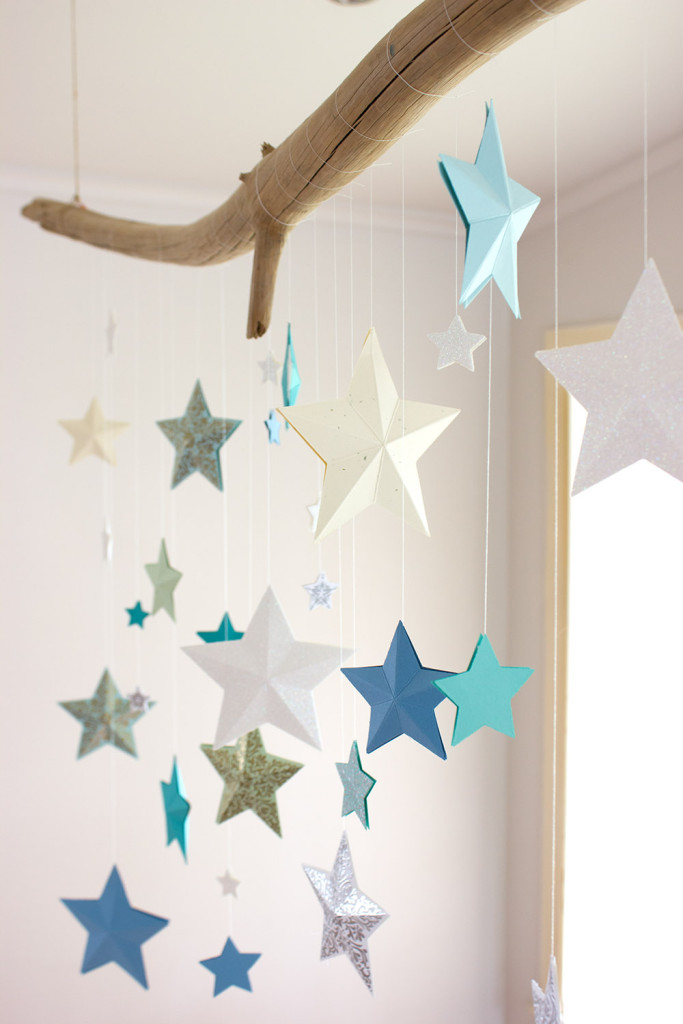
Mobile detail

Welcome, welcome to the Papercut Labs’ 12 Days of Christmas! Over twelve days the hop is providing you with some awesome Christmas projects to inspire you and (if you’re not already) get you totally in the Festive Spirit! To keep up with the hop and where it lands each day: visit our information page. And don’t forget to join the crop event for chances to win the giveaway prizes.

So where are you in the hop? DAY EIGHT! Make sure you check the blogs that have already provided inspiration, and head on over to Scrapmatts tomorrow for day nine.

Monday, 8 December 2014: Papercut Labs
Tuesday, 9 December 2014: A Piece of Cake Designs
Wednesday, 10 December 2014: Kellie Stamps
Thursday, 11 December 2014: Heidi Swapp (via Kim Jeffress)
Friday, 12 December 2014: The Scrappery
Saturday, 13 December 2014: Seriously Scrapbooking
Sunday, 14 December 2014: Maya Road (via Angella Peardon)
Monday, 15 December 2014: Stampin’ Up! << YOU ARE HERE
Tuesday, 16 December 2014: Scrapmatts
Wednesday, 17 December 2014: D-lish Scraps
Thursday, 18 December 2014: Studio Calico
Friday, 19 December 2014: Papercut Labs

Editor’s note: The Pacific region of Stampin’ Up! doesn’t have its own blog, so we talked it out with them. We’re hosting their post — and we’re so happy we are!

Today, Susan from Stampin’ Up! joins us and helps create some atmosphere to any Christmas table.

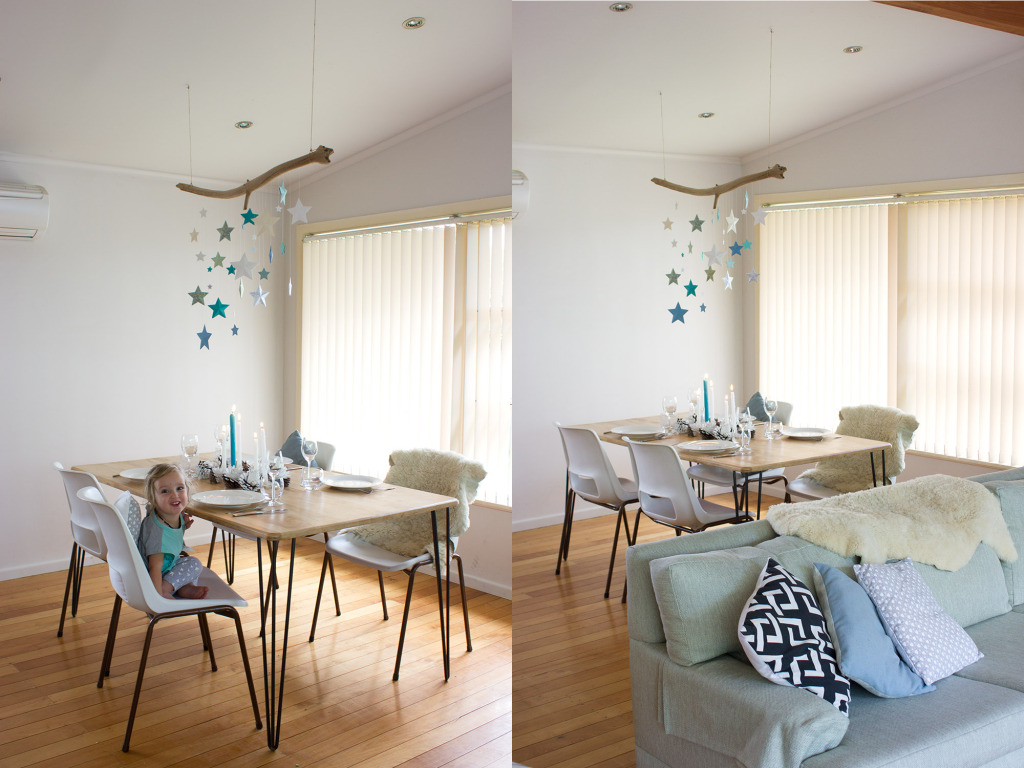
Stars Over-the-Table Christmas Mobile

Mobile Room Views

Supplies:
Inks: Versamark
Papers: Bermuda Bay, Marina Mist, Pistachio Pudding, Whisper White, Coastal Cabana, Soft Sky, Pool Party, Naturals Ivory, Dazzling Diamonds Glimmer Paper
Stamps: Bright & Beautiful
Accessories/Tools: Gold and Silver Stampin’ Emboss Powder, Stars Framelits Dies, Adhesive (I used Dimensionals and Sticky Strip)
Driftwood
Cotton Thread
Hemp twine or other for hanging
Two eyelet screws for ceiling

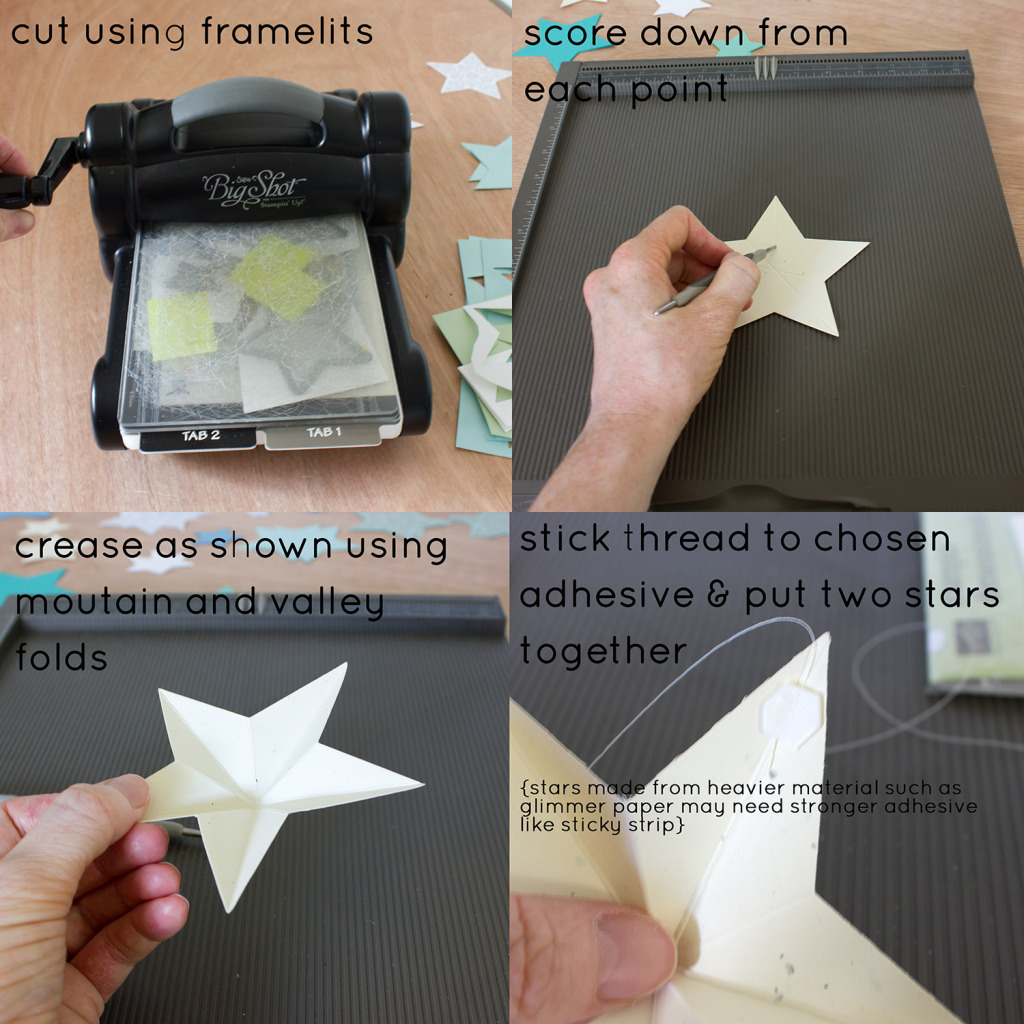
Make approximately 30 stars (see below — note, the smaller stars were left unscored, as you can see in this detailed photo). This depends on the length of your driftwood/branch/dowel of course. Make sure your threads are all about a 60–80cm long so you have some play when hanging.

Stars Instructions

Tie on your stars at varying lengths and hang to the ceiling. A friend to help you place it and get the strings the right length is definitely helpful!


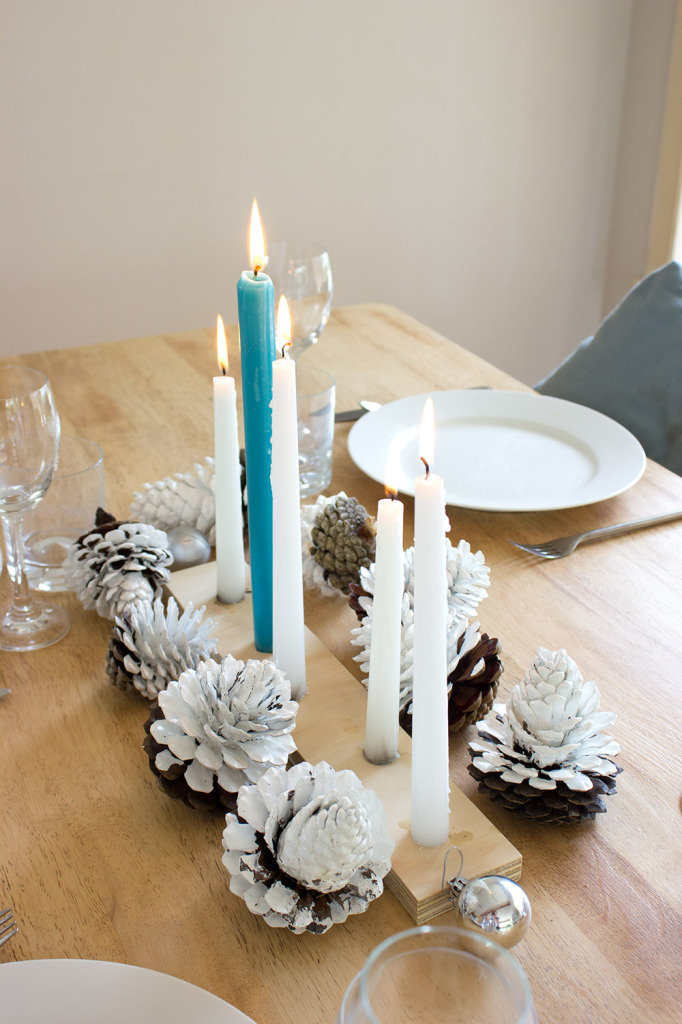
Dipped Pinecones

Table Setting detail

Supplies:
Pinecones, Baking Trays, Tin Foil, Paint of your choice

I went cone collecting with my four-year-old daughter where we braved all the bugs hanging out under the pine trees.

Bring them all home and bake on a tray lined with foil for two hours at 110C/225F.
This melts off the sap, kills all the creepy crawlies, dries out the cones and opens the ones that are closed. Plus it fills your home with a beautiful woody aroma!

Let them cool then remove any loose bits including the seed pods.

Dip in paint, drain as much paint off as you can then place on a fresh tray lined with foil and let dry. You could add glitter too if you’re game!

04 Nov

Sneak Peek & Freebie: FUN & FUNKY CHRISTMAS

Today, our Christmas classes have gone on sale! This is super exciting since I was actually filming them with Donna just three weeks ago, and I can’t wait to try some of the techniques out myself. (I have to say, I’m particularly taken with the postcard.)

You might have noticed I said “classes”. We’ve launched two: however, there’s a catch!

The full ‘Fun & Funky Christmas‘ is four weeks of jam-packed Christmas gift making, card making, advent calendar making and even table decoration making. There’s over an hour of video tutorial (probably closer to 90 minutes), and a multitude of handouts that you can take with you on any device you like.

The ‘Fun & Funky Advent Calendar‘ is just the advent calendar project. This is week two of the full course. The advent calendar is so large with so many details and so many instructions, some people might just want to tackle this one.

Which is why we’ve split it up. We want to give you as many options as possible for learning exactly what you want.

That’s enough talk though.

We’re giving you a freebie today!

Over the past two weeks, I’ve been designing and building the PDF handouts that go with the two November classes. And today, you get to download one for yourself!

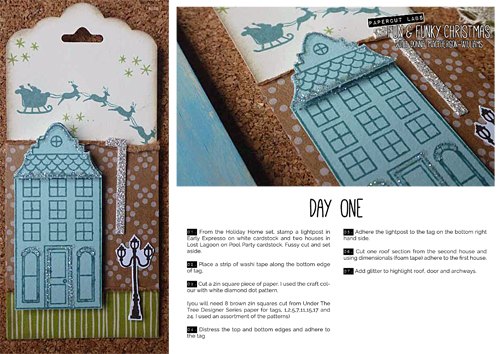
This is day one of the Advent Calendar. Most of the handouts (for both the Christmas class and Natalie’s Flashy Cards Fast) are gorgeous like this. They’re easy to read and print off.

When you press the image below, you’ll see that the images on the PDF are a little dark and the font not always sharp. This is because this is a low-res PDF, which means it’s easier to download quickly. When you’re in the class, you get the option of a low-res PDF or a hi-res PDF. Hi-res PDFs are best for printing.

** Note: there is no material list, since the whole Advent Calendar uses a similar set and the list will be a page on its own. However, if you’re looking for the materials, most of them are from Stampin’ Up!

Enjoy!

freebie_500

29 Oct

Pinterest Inspired: Handmade Christmas Gifts by Tarrah

Hi everyone! It’s Tarrah here with you today. I wanted to get a start on some handmade Christmas gifts so I went to my number one place for some ideas and inspiration: Pinterest!

These cute magnets caught my eye straight away!

Magnet8Photo Credits: Sei Lifestyle

Supply List:

Scraps of patterned paper
Word Stickers
Rhinestones
Paper Doily
Embellishments
Mod Podge
Circle Chipboard Pieces
Magnets
Sandpaper
Hot Glue Gun
Sewing Machine

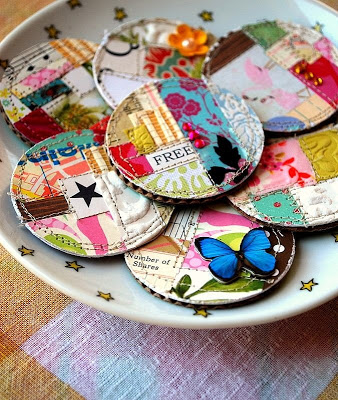
Step 1: Gather some of your patterned paper scraps and a little bit of paper doily and lightly adhere a few pieces together into a square shape (making sure that your round chipboard piece will fit) then adhere with some glue or Mod Podge to your chipboard.

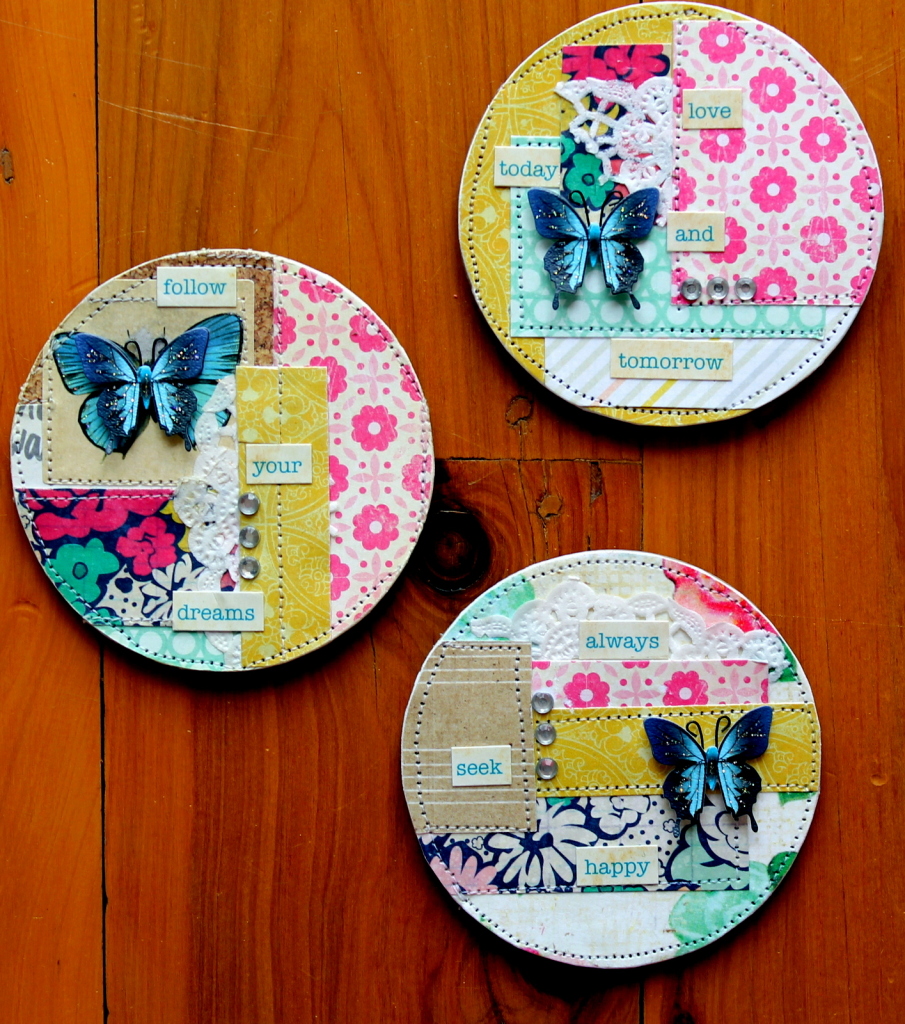
These are the ones I made:

Crate Paper Magnets

Step 2: Cut off the excess paper and then sand right around the edges to give a nice finish to your circle. Machine stitch around a few of the papers edges and around the perimeter of the circle.

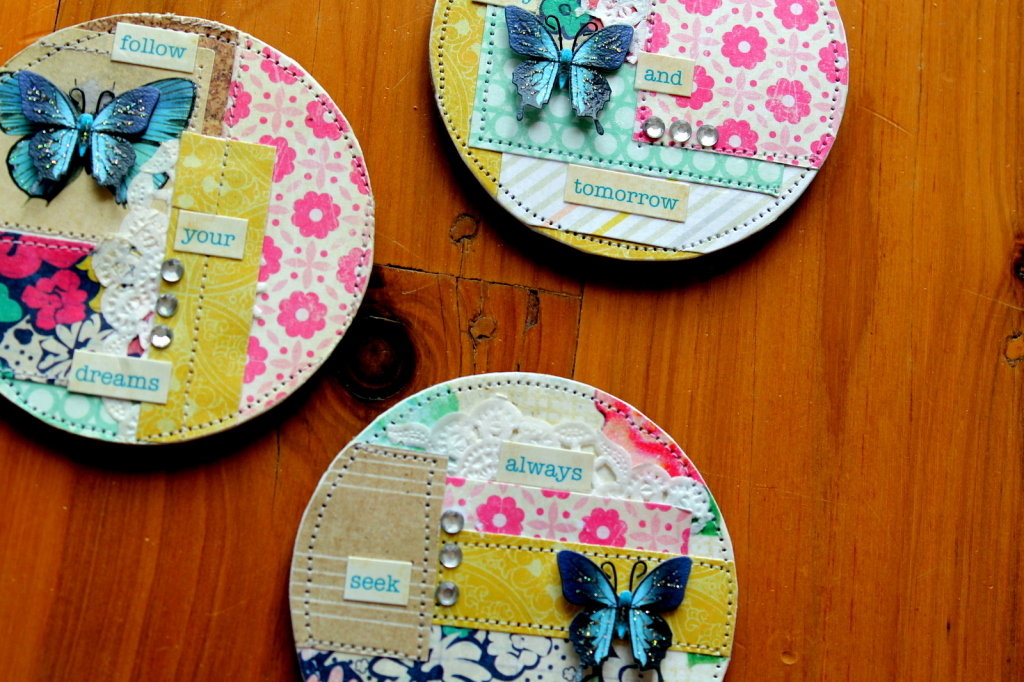
Step 3: Add some word stickers, rhinestones and embellishments like butterflies or hearts.

Crate Paper Magnets Detail

Step 4: Apply a light layer of Mod Podge over the whole circle to seal everything and then once the Mod Podge is dry, adhere the magnet to the back of the chipboard with a hot glue gun.

These cute magnets will be gifted to a couple of my girlfriends for Christmas who always love receiving a handmade gift from me!

I hope I have inspired you to get creating too, thank you so much for stopping by the Papercut Labs blog today!

Happy creating!
— Tarrah x

08 Oct

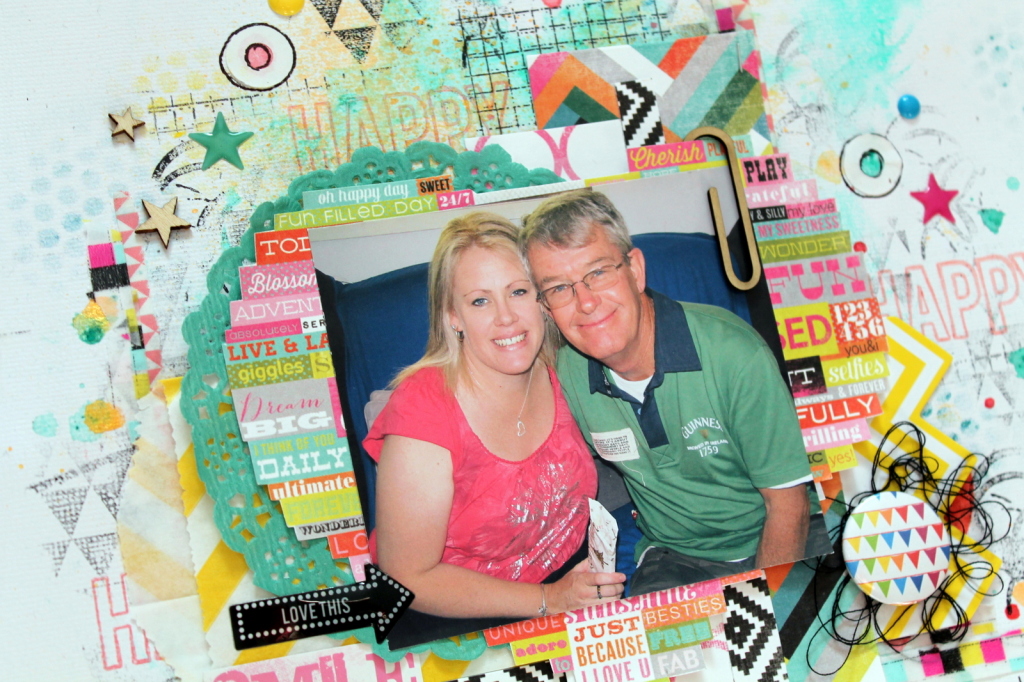
Give us a smile! [layout share]

Hi everyone! It’s Tarrah here with you today posting my first post as part of the Papercut Labs Blogging Team!

I am so excited to be here!! So I thought I would start off by sharing a layout with you all. I was totally blown away by Jen Hall’s beautiful projects and all her wonderful techniques she shared in her ‘Colour Series’ classes held right here at Papercut Labs. I was super inspired by Jen’s  ‘Water’ class and her Stamp’ class that I wanted to have a play straight away.

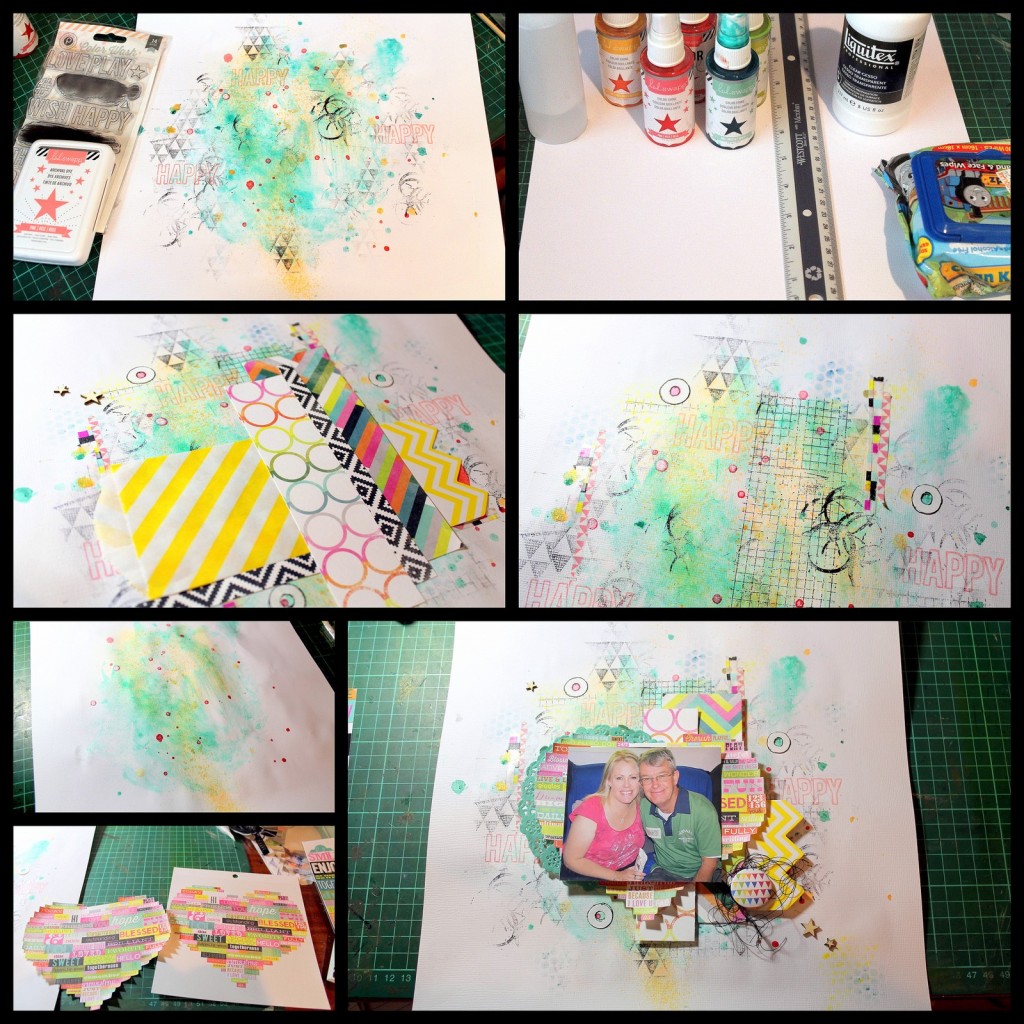
Smile Collage

I created a collage of pictures above of the creating process. I used Heidi Swapp Color Shine for my watercolour and misting techniques.

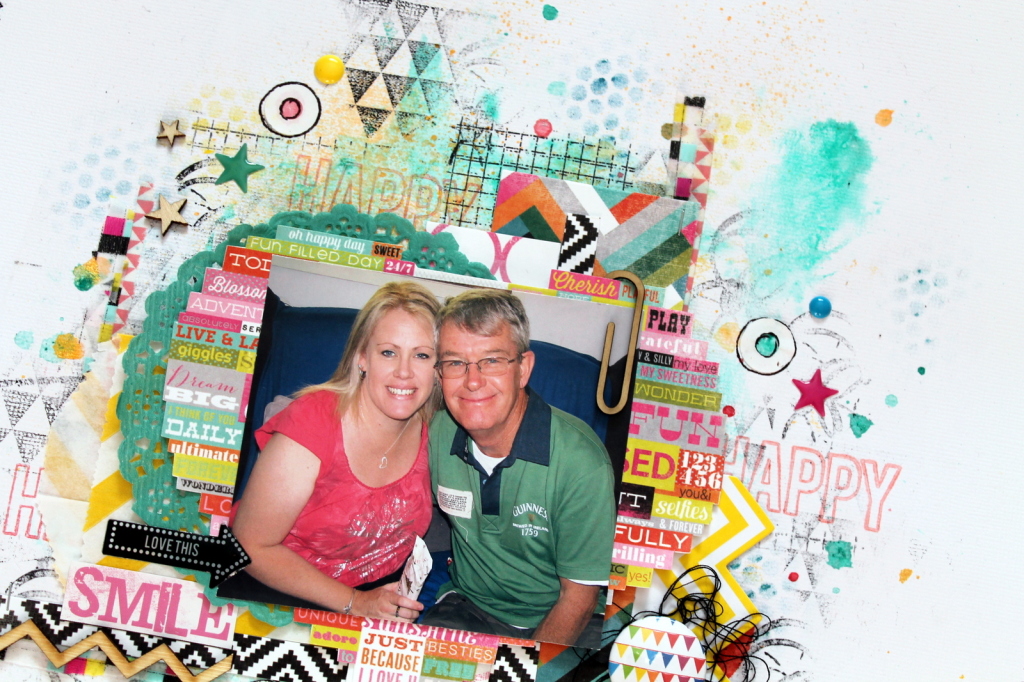
Smile

I used a mixture of different brands of stamps and inks including stamps by Darkroom Door, Kaisercraft and Pink Paislee, while the inks I used were Heidi Swapp, Staz-On and Versacolour.

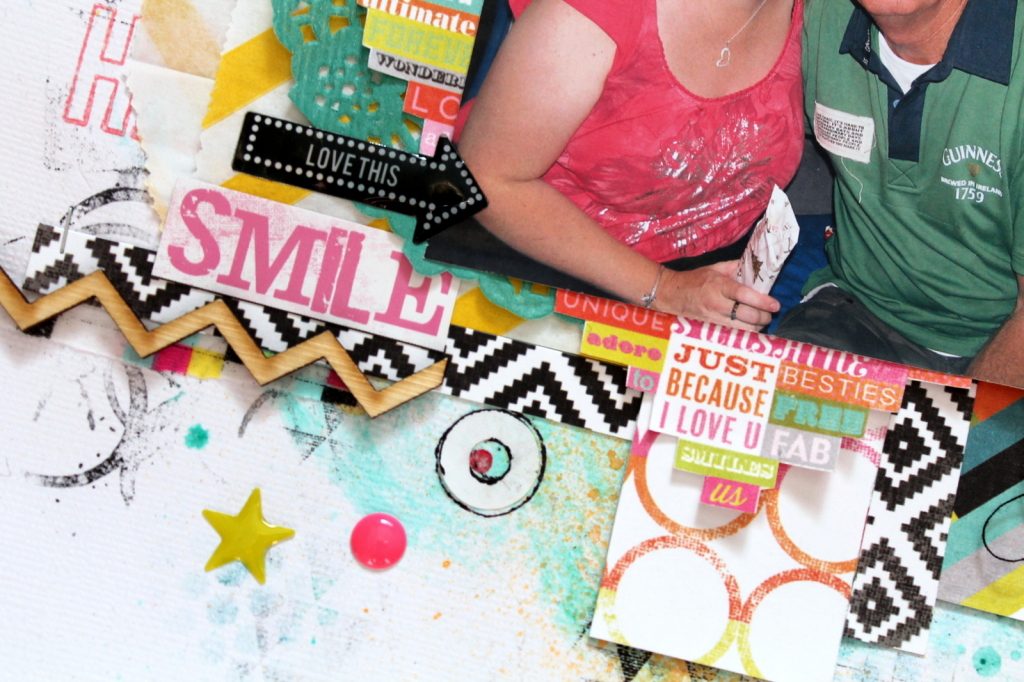
Smile Detail 5

I used some of the 6 x 6 paper pad papers from the bright Heidi Swapp ‘Favorite Things’ collection. I also added some washi tape, thread, a flair, enamel dots and wood veneer to give so more texture.

Smile Detail 4

I almost always use a doily and/or a pocket/bag for extra layering on my layouts. I love the dimension they give.

Smile Detail 2

I don’t use mediums and stamps very often on my layouts (I’m too impatient lol!) but I just love it when I do!  Thank you so much Jen for sharing your amazing talent with us in those wonderful classes.

And thank you so much for stopping by the Papercut Labs blog. I will be back really soon, but until next time: happy creating.

Tarrah x

15 Aug

Stringy backgrounds

This is probably the fifth or sixth blog post about backgrounds. I’m obsessed! I love the idea that you can make your own stamps out of anything you find lying about the house and can create something beautiful. (And apparently, it always has to be blue. I’d love to see it in other colours!) Today, consider pulling out some of that scrap-stash string and using it in a new and interesting way.